

Mold can be an ugly and unwelcome sight in any bathroom, and this living organism can cause health problems—especially for those with respiratory problems and allergies. What’s more, a small patch of mold can spread behind walls, under flooring, and above the ceiling, leading to possible rot, structural damage, and costly repairs. Therefore, getting rid of mold in the bathroom is crucial in stopping its potential spread and lasting damage.
“Mold doesn’t necessarily stay confined to the bathroom,” says Hector Stewart, CEO of Baltimore HCS Home Cleaning Services. “If not addressed, it can spread spores to other areas of the house and start growing there, as well.”
When cleaning mold from your bathroom (or home in general), safety is always paramount. Prioritize wearing protective gear, and don’t hesitate to bring in the professionals if need be. Nonetheless, the task is worth the effort: “Preventing mold in the bathroom will protect the investment in your home’s materials and finishes,” says Stewart.
When to Call a Professional
Depending on the extent of your problem, mold removal may need to be handled by professionals. “If the moldy area is more than 10 square feet, the EPA recommends professional mold remediation,” says Robert Weitz of RTK Environmental Group. The only way to know the true severity of your mold problem is to have a professional mold test conducted.
“If the mold is on sheetrock, it is impossible to remove it with bleach,” Weitz explains. “The moldy areas must be cut out, and the walls must be replaced.” Professionals can safely remove large-scale mold, ensure the mold spores are contained during removal, and treat the area with industrial-strength fungicides.
“Don’t hesitate to seek help if you experience persistent musty odors or allergy symptoms,” adds Stewart. “It’s crucial to fully eliminate mold for your health.”
Precautions for Getting Rid of Mold in Bathrooms
The key to getting rid of mold is to be as thorough as possible. “To properly remediate, all contamination must go, including the colony, roots, dead mold particles, mycotoxins, and bacteria,” says Michael Rubino, a council-certified mold remediator. “If these steps aren’t checked off, the roots could be left behind and continue growing—that’s why you have to treat mold like a weed.”
Before beginning, pay attention to safety considerations. Wear rubber gloves, protective eyewear, and an N-95 mask. Run a fan and open a window to ensure proper ventilation, and take frequent breaks to avoid fumes. Be sure to never mix bleach with ammonia or other cleaners, as the combination could produce toxic vapors.
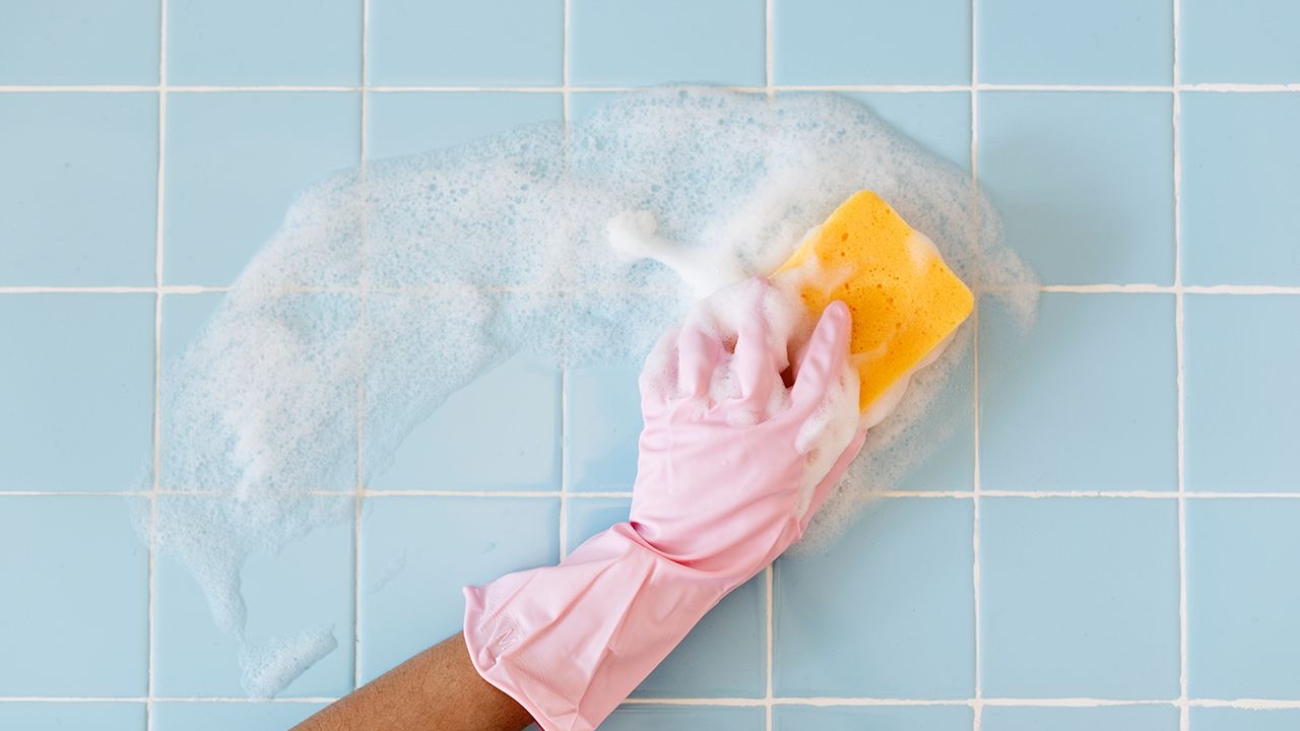
How to Get Rid of Mold on Bathroom Surfaces and Fixtures
Stewart uses a bleach solution to kill bathroom mold on non-porous surfaces, such as tile, porcelain, and glass, although additional supplies and more natural cleaners are also recommended (and in tandem) to ensure longterm success.
Materials Needed:
- Bleach (and/or preferred cleaning product)
- HEPA vacuum cleaner
- Nylon bristle brush (or old toothbrush)
- Portable fan
- Rubber gloves
- N-95 mask or respirator
- Safety goggles
- Sponges, rags, or microfiber cloths
- Cotton balls or paper towels
- Bucket or spray bottle
Step 1: Spot Test
“Always test solutions on a small area first to ensure they don’t damage the surface,” Stewart advises. “For tough infestations, you might need to repeat treatments or try a combination, such as using vinegar first then scrubbing with baking soda.”
Step 2: Wet and Vacuum Surface
Once determined that your chosen cleaning agents are safe to use, it’s time to get started. First, dampen the moldy surface with warm water to loosen mold. Vacuum the affected area with an HEPA vacuum cleaner to prevent spores from flying into the air.
Step 3: Apply Bleach
If you’d prefer to skip bleach, skip to Step 6.
Dilute bleach in water—a typical ratio is one cup of bleach per one gallon of water. Pour the solution into a bucket or spray bottle. “Using more bleach is not necessary and can be unsafe,” says Stewart. “Stick to a maximum of 1:10 bleach-to-water ratio.”
Apply the bleach solution liberally to the moldy areas. You can spray it or apply it with a sponge or cloth—just be sure to fully cover all visible mold.
Step 4: Allow Solution to Sit
Allow the bleach solution to sit on the surface for five to 10 minutes. “This contact time gives the bleach a chance to kill the mold spores,” says Stewart. In tough cases, soak cotton balls or paper towels in bleach and press them onto the stained spot. “This keeps the bleach in contact with the mold longer to whiten stains,” Stewart explains.
“For severe mold, let it sit a bit longer, but don’t let it dry on the surface. Always rinse and ventilate well after such treatments.”
Step 5: Scrub Away Mold and Rinse Bleach
Use a nylon bristle brush or old toothbrush to scrub the area to dislodge the mold colonies. “Focus on grout lines and corners where mold clings,” Stewart advises. “The bleach will have helped lighten many of the stains, making scrubbing easier.”
Rinse the treated surface with clean water to wash away bleach and loosened mold. Wipe with a damp cloth or sponge to ensure no residue remains.
Step 6: Utilize Natural Products
According to experts, bleach alone doesn’t always get the job done when it comes to fully removing mold. “Bleach leaves particles such as dead mold and mycotoxins behind, leading to continued exposure. [It] also does not deal with roots of mold colonies growing on porous surfaces,” explains Rubino.
For non-porous surfaces, like sealed countertops, apply a botanical cleaner. Several common household staples can be used to help effectively remove mold, according to Stewart. These include:
- Vinegar: Its mild acidity can kill about 80 percent of mold species. Pour undiluted white vinegar into a spray bottle and spritz the moldy surface until fully saturated. Let sit for about 60 minutes, then scrub the area with a brush, rinse with water, and dry thoroughly.
- Baking Soda: Make a paste with this anti-fungal mild abrasive by mixing with a small amount of water, or adding a few drops of dish soap. Apply the paste onto the moldy caulk or grout, and let it sit for 10 minutes. Scrub the area with a brush to lift the mold, then rinse with warm water, and wipe dry.
- Hydrogen Peroxide: This gentler alternative to bleach can kill mold spores with its anti-fungal and antiviral properties. Pour 3% hydrogen peroxide into a spray bottle and saturate the moldy surface. Let it sit for about 10 minutes. Scrub the area to remove all mold and stains, then rinse with water, and dry. Be aware that hydrogen peroxide can have a mild bleaching effect, so avoid using it on fabrics or materials that could discolor.
- Tea Tree Oil: This essential oil possess powerful anti-fungal capabilities and can be effective against stubborn mold. Mix a single teaspoon of tea tree oil per one cup of water in a spray bottle and shake well. Spray the solution onto the moldy area and let sit for at least an hour. There’s no need to rinse; simply wipe the area after an hour and allow it to dry. The tea tree oil will continue to inhibit mold growth—with a pleasant herbal scent, no less!
To ensure thorough removal, repeat the process with your chosen cleaning agent at least three times.
Step 7: Dry the Area
If rinsing is recommended with your specific cleaning agent, do so throughly. Then, dry the area fully with a towel or fan.
“Lingering moisture can lead to mold’s return, so ensure tiles, grout and seals are dry,” says Stewart. “Keep the room ventilated until completely dry.”
Step 8: Monitor Returning Mold Growth
After cleaning your bathroom of mold, be sure to monitor affected surfaces carefully. “If mold returns quickly, it may indicate deep-seated contamination or a larger underlying issue,” says Rubino.
“If the problem persists, additional remediation may be needed, or it may be time to consult a professional or replace the affected material.”
How to Clean Mold From Shower Curtains, Grout, and More
Mold can deeply root itself into porous materials and fibers like caulk, grout, and shower curtains, making removal a greater challenge.
If you find that mold is embedded around the tub or sink and it doesn’t come out with the above cleaning method, the best solution is to remove and reapply fresh caulk. “New silicone caulk or grout often contains mildew-resistant additives to help prevent future growth,” Stewart says.
Clean machine-washable porous materials (like bath mats, towels, and liners) with a botanical laundry additive, like EC3 (a mold solution concentrate), Rubino advises. However, replacement is usually the best option, as mold can embed itself deep within the fabric. Similar to newer caulk products, mildew-resistant shower curtains and bath mats are also available. “These are usually treated to deter fungal growth,” says Stewart.
How to Prevent Mold in Bathrooms
“Whether it’s high humidity, aging grout, or a leak, the root cause must be addressed to ensure the mold doesn’t just return,” says Rubino.
Consider the following tips and helpful suggestions for keeping your bathroom mold-free.
Always Use the Exhaust Fan
Proper air circulation is the first line of defense against mold. Use the bathroom exhaust fan during baths and showers and leave it running for at least 20 to 30 minutes after you finish.
“If your bathroom lacks a built-in fan, consider having one installed,” Stewart advises. “In the meantime, open a window or door to let steam escape. Even a small electric fan can help move humid air out.”
Reduce Humidity
Outside of using the bath fan, keep the bathroom door open when the room is not in use to improve airflow. “In very humid climates or bathrooms with no fans, a desiccant moisture absorber—like DampRid or similar products—can be placed in the room to passively soak up excess moisture from the air,” says Stewart.
Keep your bathroom’s humidity levels below about 50 percent to inhibit mold growth. “You can measure humidity with a cheap hygrometer,” Stewart says. “If it’s consistently high, use a dehumidifier, especially in summer or in bathrooms with poor ventilation.” Running your home’s air conditioner can also dehumidify the air.
Eliminate Tub and Shower Clutter
Avoid storing too many bottles or clutter in the shower, recommends Stewart, as they trap water underneath and behind. Keep shower corners clear so they dry out faster.
Develop Good Cleaning Habits
Sticking to a cleaning schedule can help stop mold before it even starts. You can break it down by daily, weekly, and monthly tasks to simplify your chores and create manageable habits.
- Daily: Wipe down wet surfaces. Use a shower squeegee to quickly wipe the shower walls and glass, then towel-dry the tub edge. “Consider an after-shower spray,” recommends Stewart. “Spray a vinegar solution or a commercial daily shower cleaner after each use. This helps prevent soap scum and mold from building up on surfaces.”
- Weekly or Bi-weekly: Launder your towels and bath mats, and clean your bathroom with a bathroom cleaner or a vinegar solution to remove soap scum and invisible mold spores. “Pay attention to corners, shower tracks, under shampoo bottles, and other damp spots,” says Stewart.
- Monthly: Wash your shower curtain and liner to remove any mildew starting to grow. “Plastic shower curtain liners can go in the washing machine with warm water and detergent, plus a little bleach or vinegar,” Stewart says. “You should clean the shower head at least once a month, as well.”
Perform Regular Maintenance
Regularly check for and resolve structural issues as soon as they’re spotted, says Rubino, such as misaligned tiles and aging grout. “They can trap moisture and particles, allowing microbial growth,” he says.
If you suspect a leak inside a wall or a plumbing issue, repair it promptly. “Chronic dampness is a mold magnet,” Stewart explains. “In cases of mold growth on the ceiling or walls beyond just surface mildew, there might be a ventilation issue or water intrusion from outside—these situations may require professional investigation.”
And finally, if you repaint your bathroom walls or ceiling, use a mold-resistant paint or a mold-prevention primer, says Stewart—especially on the ceiling above the shower.
Source link
Add a Comment